
Ontario Farmhouse Instructions
This structure is a bit outside Payette Valley Models usual structures. It is not directly railroad-related, it is late in the era generally modelled, and it is not only “back east”, but Canadian as well. But still, it’s an interesting building that is suitable for many layouts.
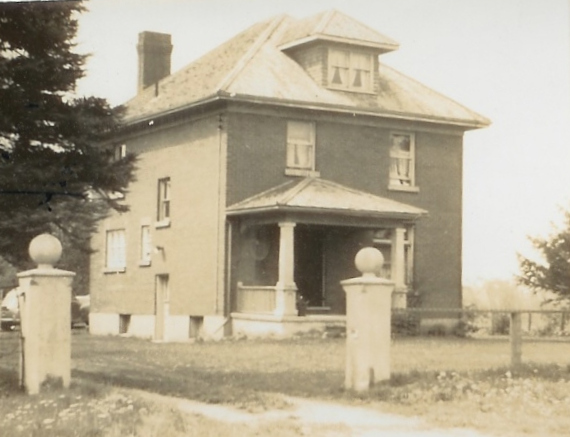
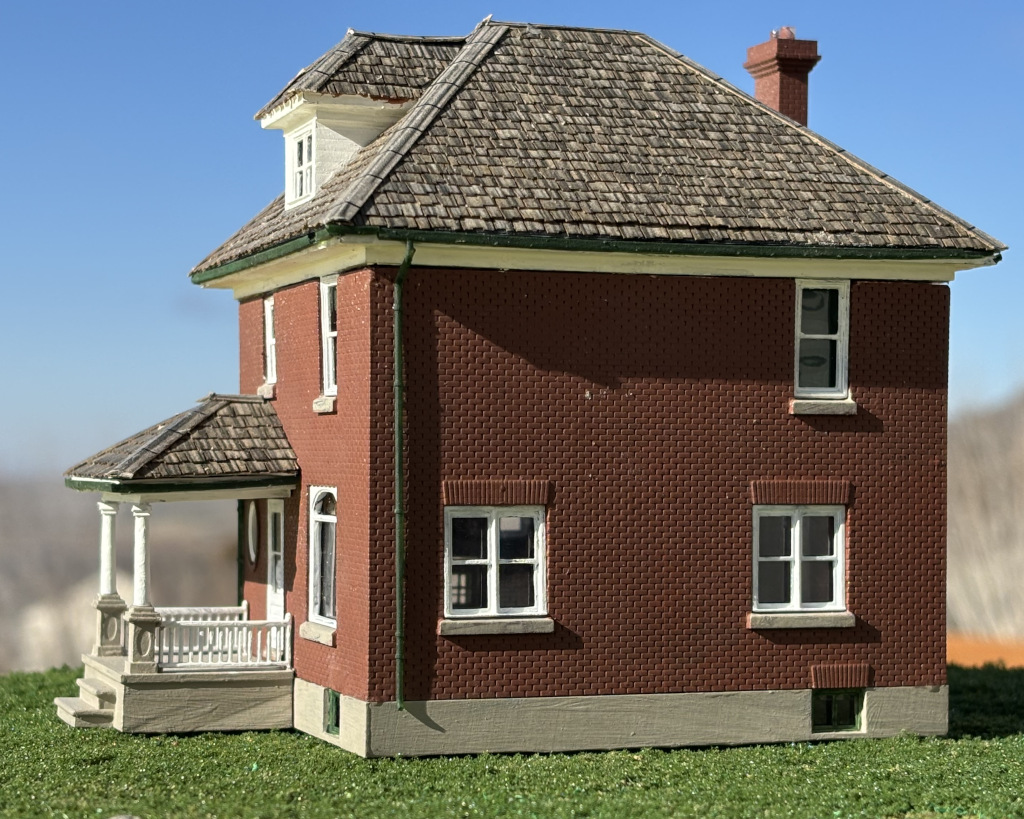
The prototype was built in 1910 near the shores of Georgian Bay in Ontario, Canada. It was the residence of a family working a 50-acre farm, having two barns and a windmill-driven pump for a well. The buildings no longer exist and the land is now part of a neighborhood.
As always with building a kit, read through the instructions before beginning assembly.
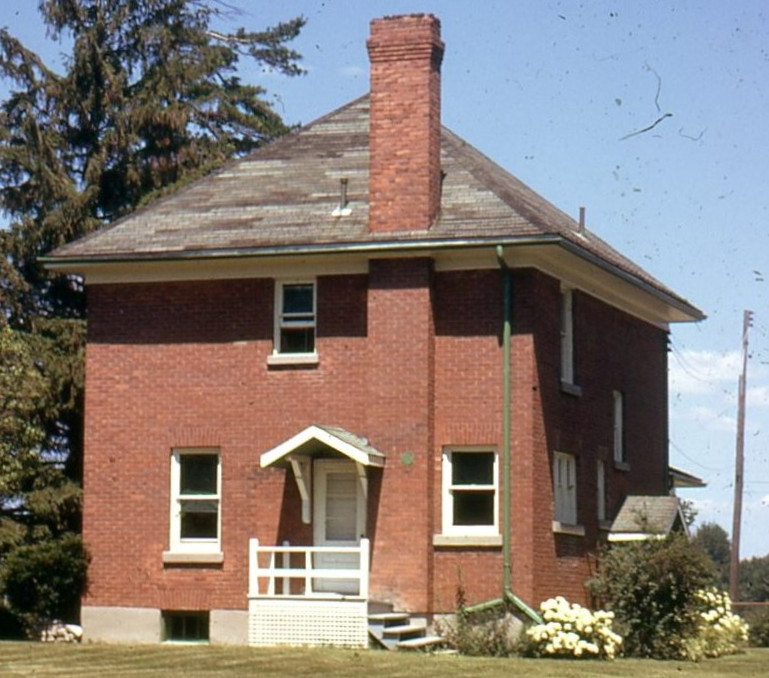
I was able to obtain two photos of the prototype: the first from the 1940s, the second from the 1960s.
For those interested in detailing the interior:
The prototype had a full attic. On the second floor, four bedrooms in each corner with a small bath center rear. There was an octagonal shaped common area in the middle.
The main floor was split in half along the depth: a parlour in the front right, a dining room in the rear right. Entry “room” on the left front with stairway along the left wall. The stairway had a landing hallway up with a window, then turned into the interior to the second floor. The stairway to the attic from the second floor crossed over the landing of the lower stairs along the left wall.
An open hallway ran between the front and rear doors with bath against the middle left wall and kitchen in the left rear. The outside side door opened to a landing with stairs down to a full cellar and a short flight of stairs up to the first floor. A cistern was located under the kitchen in the left rear corner of the cellar.
Interior details are not included with the kit.

Construction
This kit is made entirely of 3D-printed semi-transparent “smoky black” resin. This material may be lightly machined and will (usually) survive mild abuse. While not as brittle as many 3D resins, it is not “break-proof”. Small parts can easily break.
The material may be fastened with “superglue”, epoxies, or “Gorilla Glue” (a polyurethane substance originally intended for woodworking); regular plastic glue will not hold and wood glue will not form a sufficient bond. I usually use Gorilla Glue as it doesn’t require mixing and allows more time to apply clamps and adjust placement if necessary. It also cures clear. It generally sets enough for mild handling in 2 hours.
There may be nubs on the printed pieces. These should be removed by light sanding. Fingernail files work well.
Glazing material in the form of uncut acetate is included but roofing material is not. Roof material and color are dependent on the desired age of the structure and whims of the modeller. Cedar shake shingles were originally used, the roof was re-done with dark green asphalt shingles sometime in the 1940s; a brighter green shingle was applied in the 1970s.
There are four major pieces: the foundation, the main walls, the roof trim, and the roof itself. The roof has a dormer printed as one piece.
It is strongly suggested the parts be painted before assembly. The cellar windows are embedded into the foundation; the prototype cellar window frames are metal and painted a dark green. The foundation and window sills are concrete. It may be desirable to paint the interior walls flat black … depending on window treatment and whether the interior is detailed.
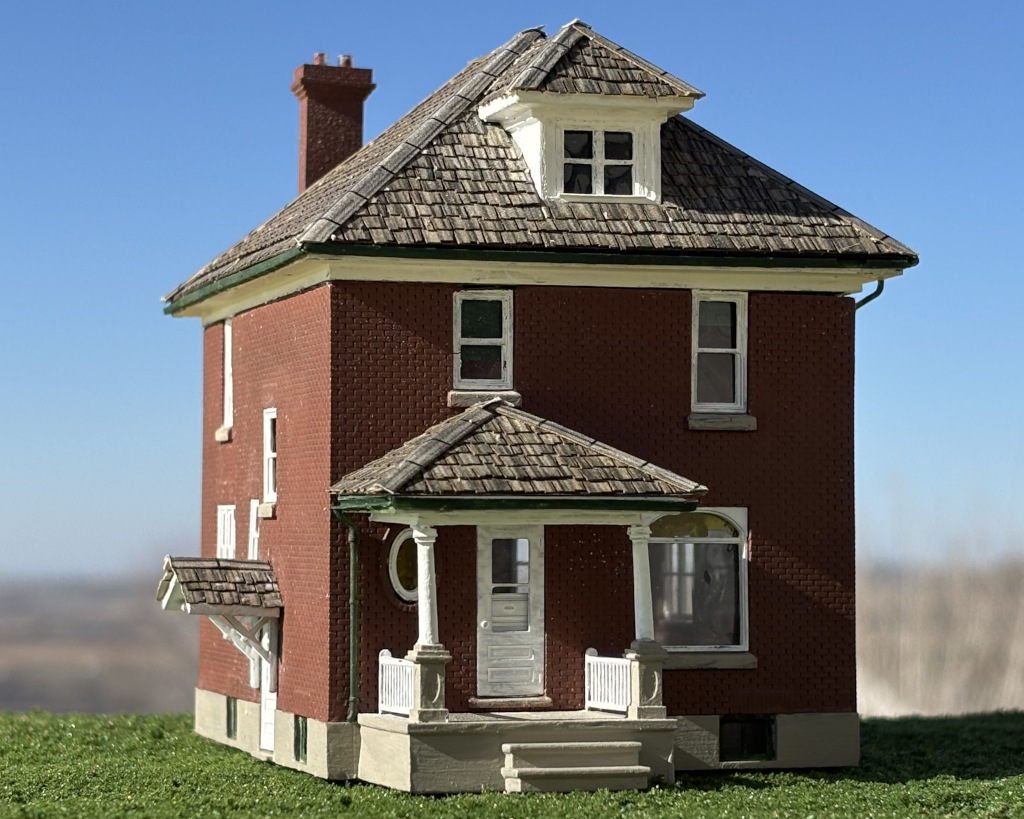
One method of painting brick: Paint the structure orange. When that paint has fully set, apply a thinned coat of red oxide or similar color. This wash does not need to be evenly applied; several thin washes are suggested until the desired effect is obtained. The prototype color is shown in the photos but yellowish brick was not uncommon in the region.
Step 1:
The foundation has cross-bracing built in which makes handling the assembly during construction easier. Sand as necessary to make sure the foundation sits flat and that the windows and door opening are on the upper side.
Fasten the walls to the foundation. The corners should line up as should the door opening on the left side and chimney slot in rear. There is bracing for manufacturing purpose across the door opening on the foundation – remove this after the glue has set.
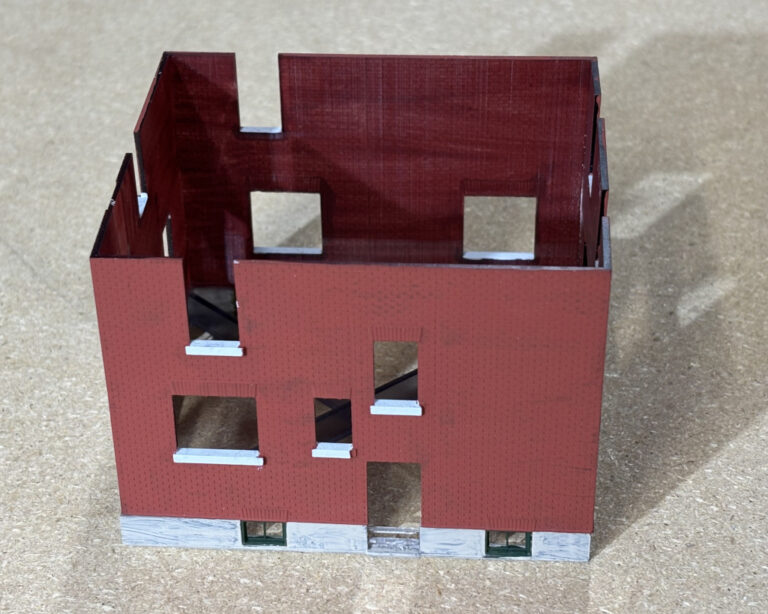
The windows are intended to be mounted flush to the interior side of the walls. The windows should be fastened from the interior.
Windows and Doors
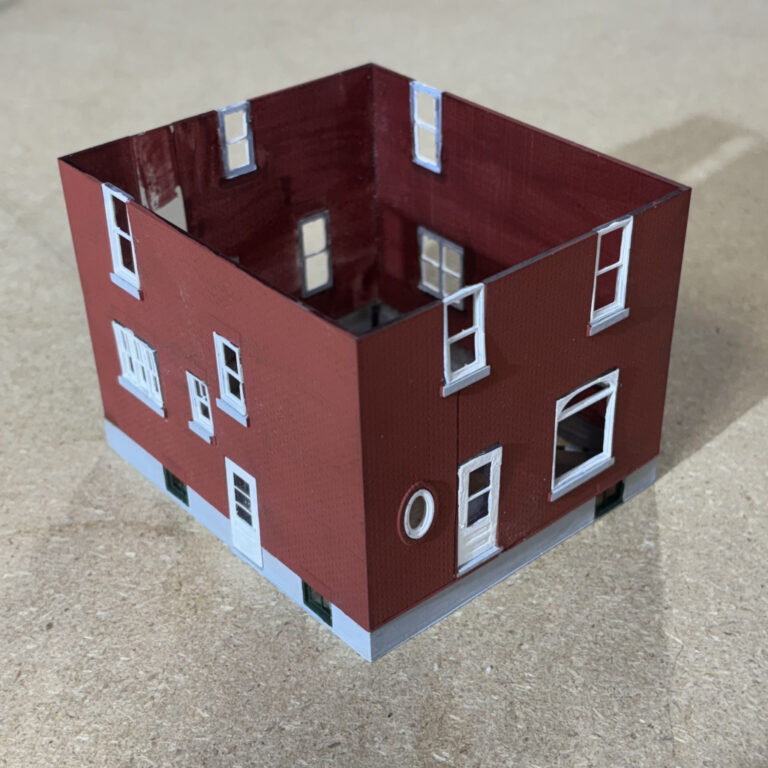
Any glazing and window treatment (such as blinds, curtains, coloring, etc) should be done now. Aleens Tacky Glue works well to hold the acetate material to the wall. Although white when applied, Tacky Glue dries clear. The oval window and main front window do not have shades. Don’t forget glazing on cellar windows (embedded in foundation) and dormer.
Since the windows are intended to fit flush to the inner wall, one possible method of glazing is to simply glue a strip of acetate across the windows against the wall rather cut individual pieces for each window.
There are two styles of main front window included: a square top and a rounded top. At some point in time, the rounded top window was replaced with a square top window. Many of the other windows have alternates: open, partially open, closed. There is no way to properly identify which window goes where. The two lower right side windows are identical (and do not have options). the two upper side windows and front right window are identical and have options. The remainder simply “fit” in the intended openings.
The oval window and upper section of the main front window could be colored with transparent paint such as that offered by Tamiya. It may be desirable to place some form of black material inside the window glazing to prevent viewing on the unfinished interior.
Once the windows and doors are painted, they might need mild sanding on edges. Fingernail files work well. Want fairly tight fit; not loose enough for gaps, not tight enough to require force to place.
Doors are in two pieces: inner and outer. In later days, the prototype doors were all white with old brass doorknobs.
Roof
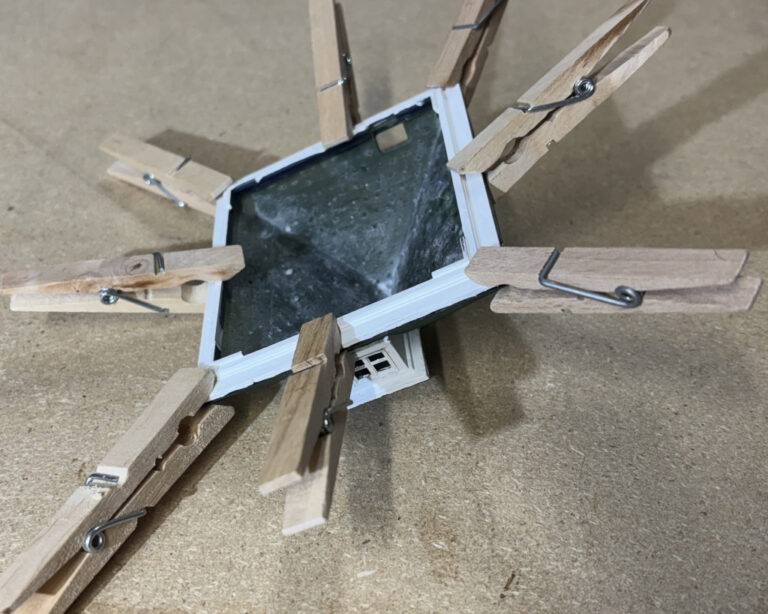
The roof trim piece and the roof should be treated as a sub-assembly. Because of potential irregularities in the surfaces, the two pieces should be heavily clamped until the glue is set. Clothespins work well.
Make sure all interior work is complete: window treatments, paint, etc. Although the bottom remains open, the cross-bracing may hinder access once the roof is placed.
Fasten the roof sub-assembly to the walls. There are tabs to assure proper placement. Make sure the dormer is to the front. It may be advantageous to use “bean-bag” style weights while the glue sets to assure a good fit with no gaps.
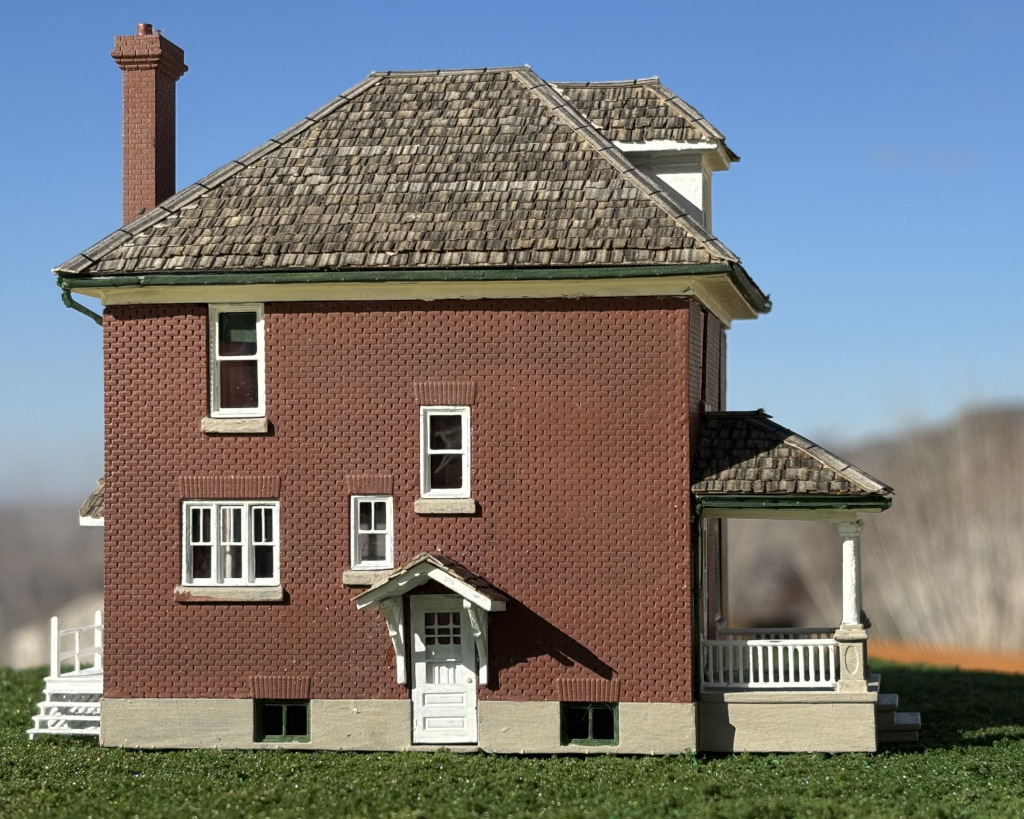
Make sure blank face of chimney is flat – sanding may be required. Make sure brick face faces outward. Fasten lower section of chimney to rear wall. Top of this section should just extend into roof support trim.
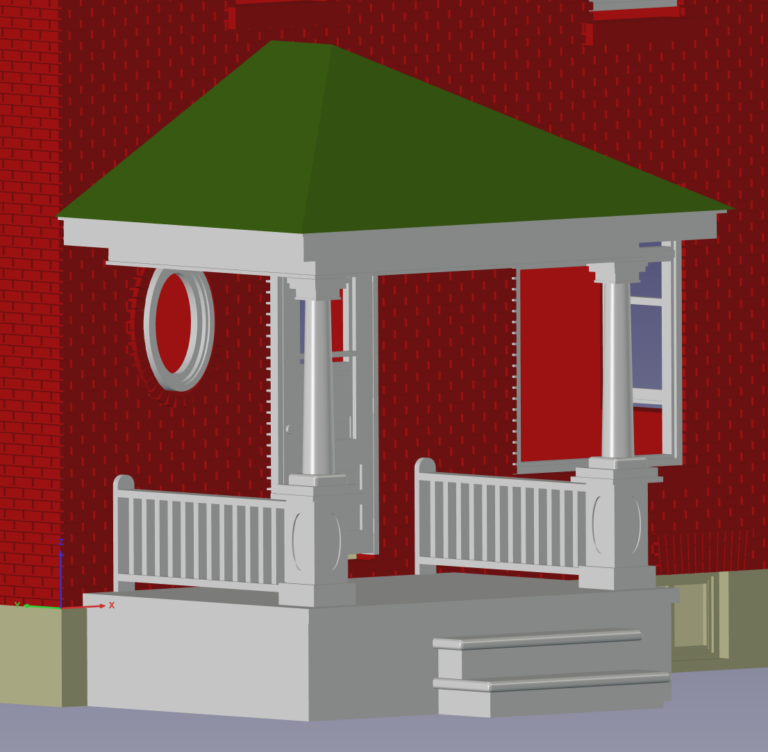
Porches
Assembling the front porch may be the most difficult part of this kit.
it is desired to fasten the front porch to the front wall but it needs to be lined up such that the left side of the porch roof lines up with the left front wall edge. There is a thin line on the from wall of the foundation; the left edge of the porch base should just cover that line.
The porch pillars will hold the front of the roof; the pillars overlap the framing of the roof support and the roof peak is just below the upper left window sill. When everything is in place, finally fasten the porch to the front wall. When that has set, place the roof.
The rear porch is a single piece. It tucks up to the chimney while sitting flush to the wall. fasten with the glue of choice. Let sit until glue sets
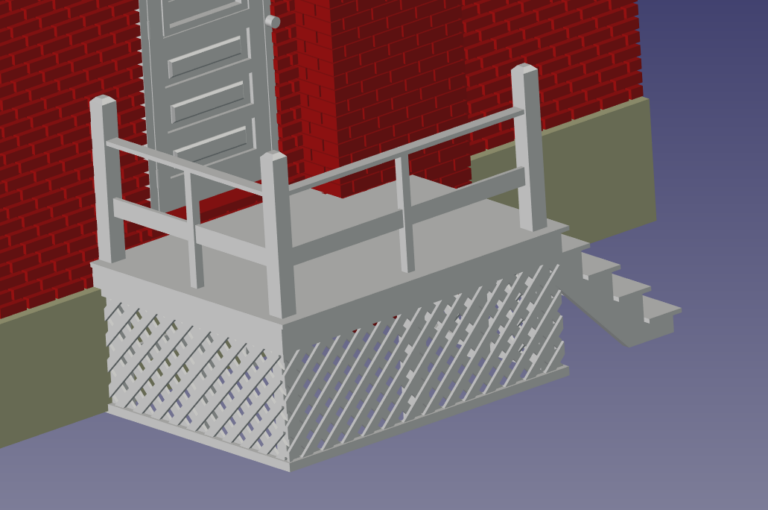
The roofs over the side and rear doors are optional. The prototype had those roofs added “later”. If added, place the porch roof supports on either side of the doors such that the upper side of the supports are two brick heights above the door. When set, place the roofs. Note: the side door roof tucks in tight against the window sill
Final Pieces
Place the upper section of the chimney. It should line up with the lower section.
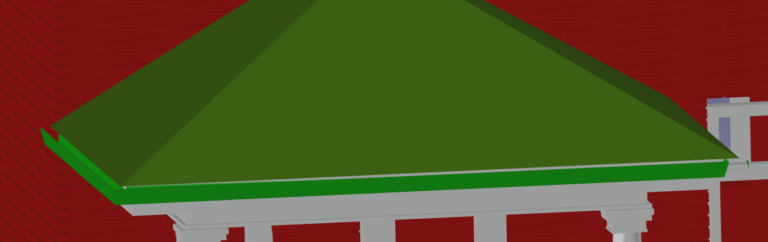
Modeller’s choice: Roofing first or gutters?
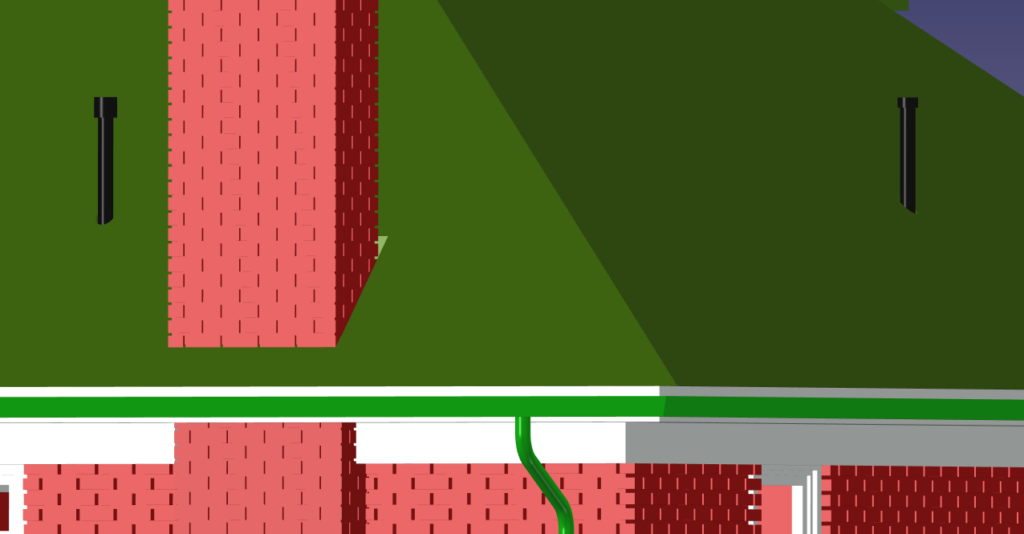
The gutters may be placed now but they are fragile and subject to crushing if handled. An extra section is included for patching if necessary. The alternative is to place the roofing material first, noting that the two vent pipes need to be placed.
The front porch gutter is one piece. Place it against the porch roof trim
There are four sections of gutter for the main roof: two longer than the other two. Place along the roof trim making sure the corners line up.
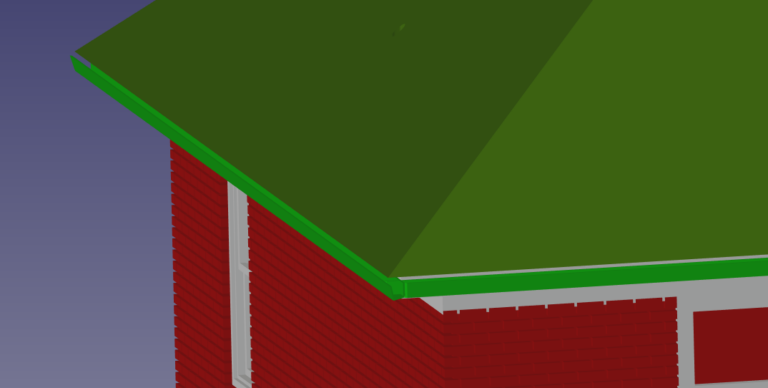
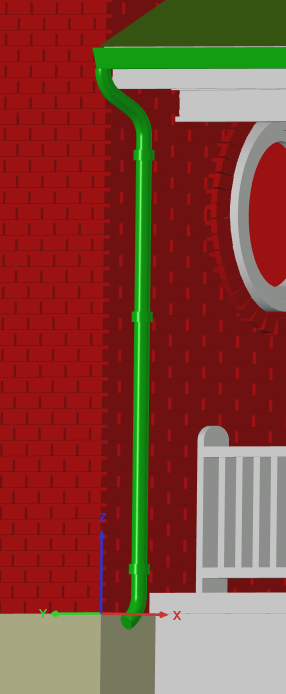
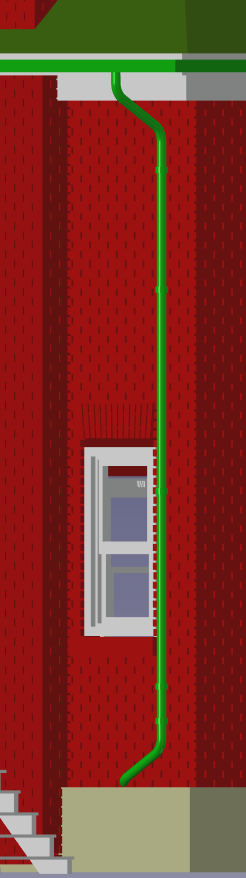
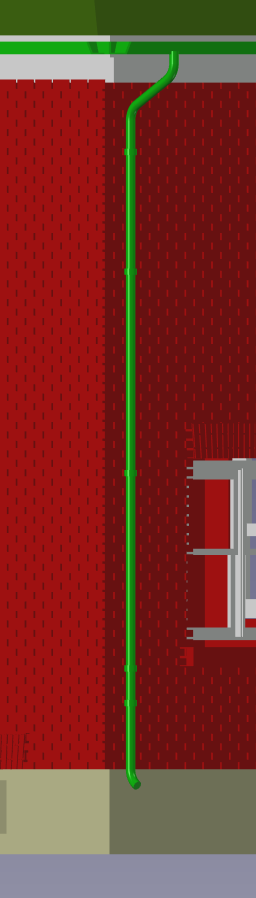
Fasten the three drain spouts:
If not done so already, place the two vents into the roof
If not added before, apply roofing material
Place completed model in desired location