Kentucky School Instructions
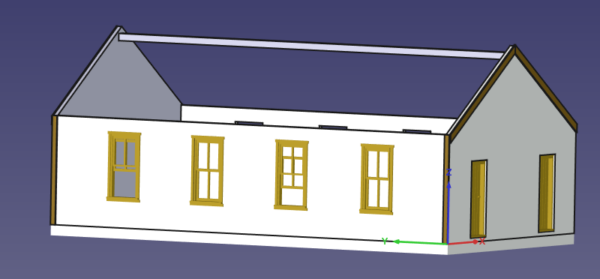
A bit outside Payette Valley Models normal stomping grounds, this Kentucky school house was built in 1887 well up a “holler” and served its local community not only as a school, but as church and meeting hall as well. I would imagine weddings, christenings, and funerals – and just general “goings-on” – occurred in this building as well.
The building still stands and is still used – rarely – for miscellaneous gatherings.

A small creek – more ditch than creek – runs alongside the right side of the structure under the trees; running into a creek running along the back just outside the left side of the photo.
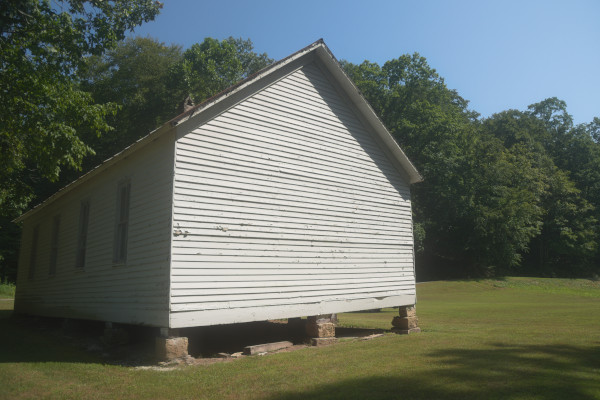
Notice the slight swale running underneath the structure … which is built upon cut-rock support stones – allows flood waters to flow underneath the building rather than through it
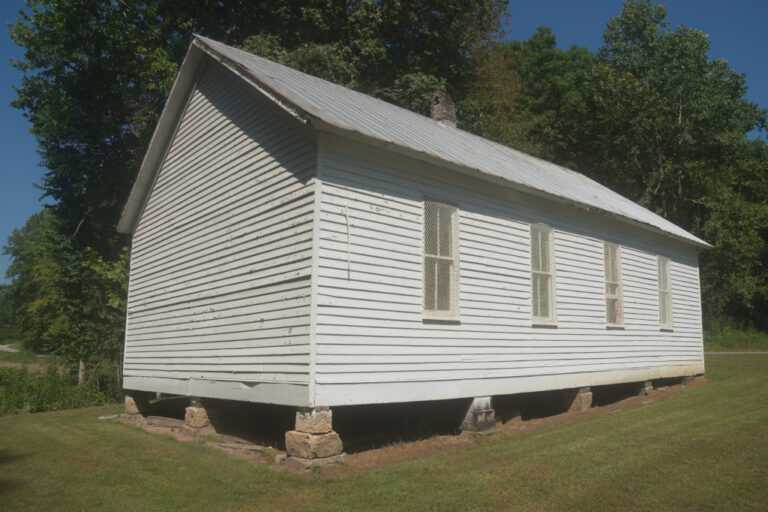
Other than the chimney, roof, doorknobs, and concrete steps, the entire prototype structure is painted white and older photos indicate that is the color as built. However, the roof was originally shake shingles – at least in 1902.
If following this color scheme, the structure should be painted after assembly with the foundation but before glazing or the roof is added. The roof may be painted with a wood-ish colored base even if shingles will cover it. The modern roof is ridged aluminum sheets. Roofing material is not included as the choice of material is modeller’s choice.
Construction
There are two methods for assembling this kit: prepare the walls including painting, installing windows and trim first, or construct the basic structure with trim, then paint and install windows.
Either works.
Noting that the prototype is all white except the roof and chimney, the draft model assembled the walls and trim first.
It is often good practice to paint and place windows and doors into walls before assembly, especially if painted a different color.
If painting as the prototype, delay painting until after the main assembly is complete. The sill, windows, doors, and trim would be placed before paint. If contrasting colors are to be used, paint before assembly.
Windows/Doors
Modeller’s choice: On the prototype, the walls, sill, windows, and doors are all painted white. Paint has caked up over the years. The doors and windows can be placed before painting or after. Both methods were used in developing the kit; it turns out to be personal preference. Painting after placement may emphasize the application of many coats of paint over the years.
The doors and windows should fit snug without sanding but nubs on the windows from the printing process may require a light touch with a flat file. Fit the windows first to check; the windows should fit flush to the inside of the walls. If needed, the flat file from a jeweler’s file set works well; a fingernail file also works. Only a light swipe with the file should be required.
There are more windows included than the 8 required. There are 8 fully closed windows, and several half-open and fully opened versions. Pick and choose as desired.
The screening on the prototype’s windows is not included nor is it original.
A sheet of acetate is included for glazing if desired. For fine detailing, the acetate should be cut individually for the upper and lower sashes of each window. An easy way out is to place a piece of acetate over the entire window. Note that “glass” should not cover the open portions of the window. Aleene’s Original Tacky Glue works well for fastening the acetate. It dries clear.
The doors are almost identical except for knob placement. The door knobs are toward the center of the wall. I place the building on end on a flat surface and place the doors from the inside to make sure they sit flush to the outer wall.
Walls
It may be beneficial to place a support beam along the length of the side walls and vertically along the center of the end walls to prevent warping caused by the paint or stain. If this is done, make sure that support will not interfere with the insertion of doors and windows. Alcohol used as thinner with acrylic paints has less warping than water as a thinner.
Using 90 degree blocks and squares, attach one side wall to one end wall for both sets. The sidewall butts against the end wall such that the exposed end shows to the side. This end will be covered by a trim piece.
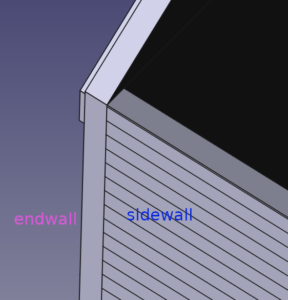
The sidewall is oriented such that the window openings are closer to the top than bottom.
A very thin line of wood glue (Titebond III for example) is used to initially hold the walls together. When that glue has set hard enough to gently handle the assembly, a toothpick or small section of scrap wood is used as a brace in each corner with a heavier application of glue.
Let the assemblies sit for several hours – or overnight.
A section of 1×6 board is used to cover the joints on the side walls. Trim is not applied to the end walls.
There are two 3d-printed foundation/sill pieces included: one sits flat to the ground, the other has “rocks” as supports in the manner of the prototype building.
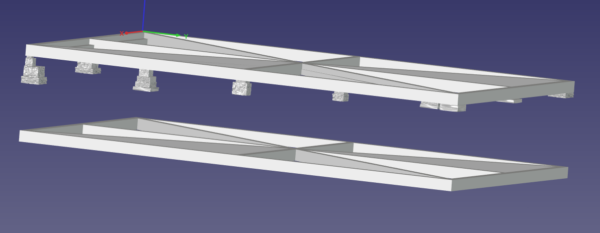
Select one or the other to use on the structure. Because the sill is colored the same as the walls on the prototype, the sill is attached to the walls before painting (the rocks can be painted later).
Assemble the two wall sections in the same manner the end and side walls were joined: a very thin bead of glue on the wall ends to hold the assemblies together – using (but not gluing) the foundation/sill to make sure the walls align properly with the foundation/sill – then brace pieces added with a thicker application of glue.
Once the glue on the wall assembly has set – several hours or overnight, the walls are fastened to the sill. The corners should line up. Wood glue will not hold well, superglue, 2-part epoxy, or plain Gorilla glue work well. Gorilla glue allows a bit more time to “tweak” placement if necessary.
If using gorilla glue, place a thin bead of glue on the sill, moisten the bottoms of the walls, and align the walls with the outside edges of the sill. Placing weights across the top of the walls while the glue sets (about 2 hours) helps assure an even joint between the walls and sill.
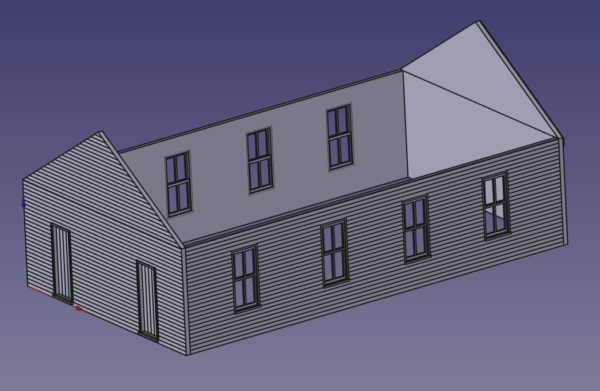
1×6 boards are used as trim at wall junctions. Note the prototype only has trim along the sidewalls, not the end walls as is more common.
The upper edges of the walls – along the roof – use 1x8s as trim. Cut the peak lengths at about a 30 degree angle.
Paint
Now that the structure is (almost) complete, it’s time to paint if not done so already. All surfaces, doors, windows, trim, and eaves are white on the prototype.
Vallejo Model Color Off-White, 70820 is close to the prototype color. Both the wood walls and resin sill are “thirsty”. Thin the paint about 50% with water, alcohol, or special airbrush thinner (Vallejo’s 71.161 thinner to match the paint) and apply a brush wash as the first coat. An airbrush may also be used.
Using a couple coats of thinned washes – a little less thin for additional coats – loses less detail as paint straight from the bottle goes on too thick for the walls. Usually 3-4 washes is sufficient.
However, if the doors and windows are painted separately, use full-strength for the second coat. Watch that the paint doesn’t “glob” at the corners of the framework on the windows.
Roof
With the walls assembled and doors and windows in place, it’s time to add the roof pieces.
At this time, cut a length of 12×12 roof beam lumber to the same length as the sidewalls; place the roof beam between and just below the peaks of the end walls. Make sure the beam does not extend above the roof line; it is intended as a brace for the walls, not support for the roof pieces (though with careful placement, it may serve as such).
Fasten the pieces to the walls, leaving equal overlap front and rear. The chimney notches in both pieces should line up.
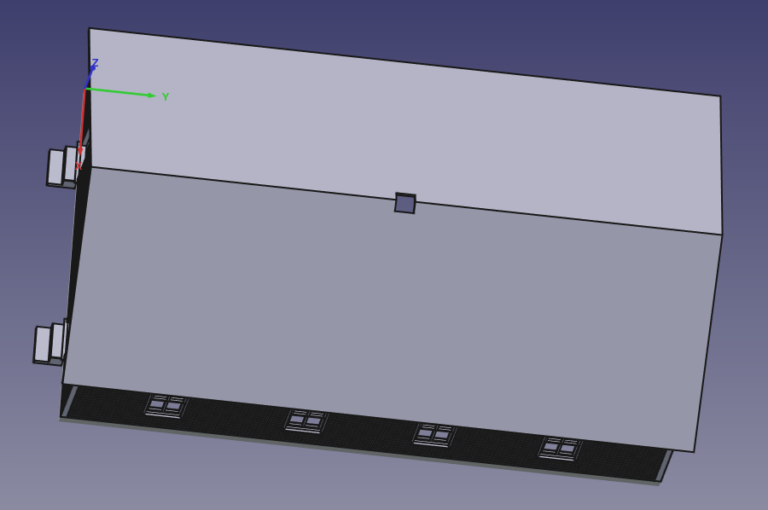
Add a thin bead of glue to the wall tops, center the overlap on the ends, and place the upper edge of the roof to the peak. With both pieces in place, there will be a small gap at the ridgeline. This will be covered by the roofing material.
Once the initial glue has set, add toothpicks from underneath as braces along the roof/wall edges and roof peak.
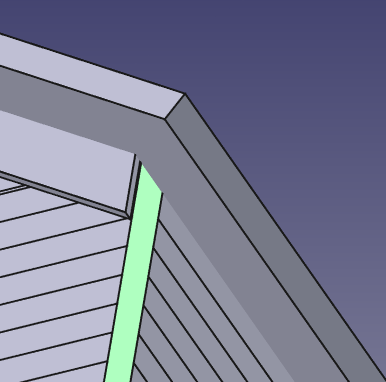
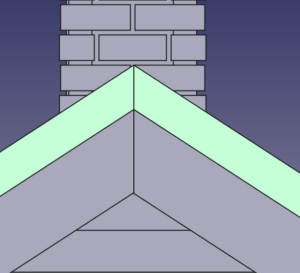
Now to add the trim to the roof edges. 1X8 boards are used as trim along the roof edges. The upper edges of the two end roof pieces – with the notch – should be beveled to about 30 degrees so that they fit fairly flush. The joint will be covered by the roofing.
The final detailing requires painting the rock supports on the sill (if that sill was used), using a bit of metallic bronze (Vallejo 70.998) on the door knobs, and a bit of “brick” on the chimney.
One technique for the chimney is to apply a coat of orange to the brickwork. Once that paint has set (24 hours?), apply a sloppy wash of red oxide or some other similar “brick red” color.
For detail, individual bricks can be painted with slightly different shades or thickness of color. This inside and upper reaches should be painted with a thin flat black wash. Place the chimney upside down so that the black wash tends to flow towards the chimney top, not the lower bricks.
Put the chimney in the opening of the roof to a depth desired.
Roofing material is not included due to the variety of materials possible and individual modeler’s choice. The original structure had wooden shake shingles; Wild West Scale Model Builders is one supplier, a Google search will bring up a variety of other suppliers.
Corrugated tin roofing would be appropriate for such a structure but the prototype never had such. It has had 3-tab asphalt shingles in the past but currently has silver/gray ridged metal.
The concrete steps – original – are added when the model is put “in place”.
Interior
Provided as information only; interior pieces are not included.
An interior is not readily visible on this structure but for those desiring the detail:
A 495” x 280” floor may be added if so desired. The prototype has 3.5” black walnut planks running crosswise.
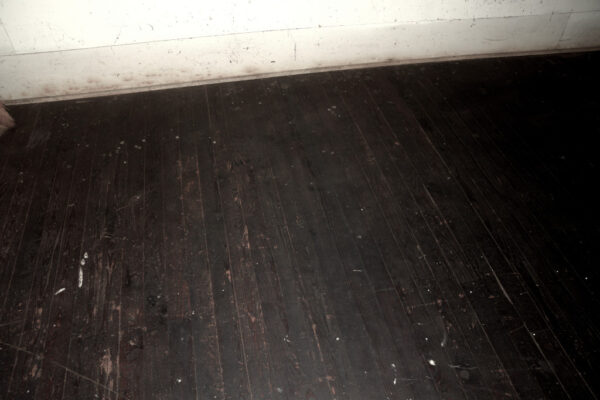
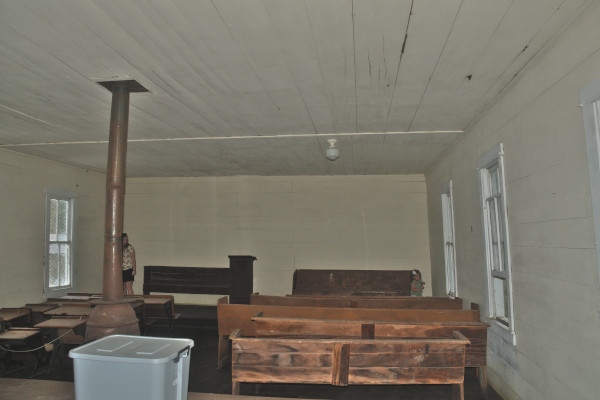
Other than the floor, the interior is all white. The inside walls are made of 12” planks. There was once a blackboard against the far wall.
The ceiling is a hodge-podge of planks of various widths running lengthwise … roughly 6” to 14”, each 15’ long in front, 15’ long in middle, length to fit in rear half. There is a 4” trim piece across the joints.
A simple pot-bellied stove sits in the middle, its 8” pipe going straight up to chimney
The electric lights are a much later addition; the kerosene lamp holders are still in place on the walls.

Prototype Setting
Place on a field of grass, a creek running at the lower edge of the property about 50’ behind the building, a weed-grown ditch to the creek alongside the right side, maybe 15 feet away. A dirt road along the front. Boys and girls outhouses near the creek on either side of the school, and a 5’x5’ well just off the front left-hand corner completes the scene.
The Kentucky Schoolhouse is now ready to be placed.