Things Nice To Know
Information regarding our kits, their manufacture, and general assembly. Plus other items of interest … at least to us – and maybe you.
All kits are treated as custom built-to-order. We are a small outfit; each kit is produced by hand, not automation. While some kits may be in inventory, most are not. Those that are not will usually ship within 7-10 days. For those kits with parts currently in inventory, we are usually able to package and ship your kit the day after your order is received excepting weekends and holidays. It is tracked once the shipper accepts the package.
The shipping rate given represents the lowest shipping cost – often US Post Office Ground Advantage.
We can arrange other shipping methods if desired upon request. Additional shipping charges and handling fees may be applied.
Feel free to email us anytime if you have any questions about your order.
All pricing is in US dollars.
Kits are built to order and are not returnable. Orders may be cancelled within 3 days of purchase. If you have a question, please contact us, we’re happy to help out.
We accept credit cards through Stripe.
We will do everything we can to help out if there is an error with your order. If you have any questions about a product, please contact us via email or the “Have A Question?” form to the right.
International customers are responsible for any local fees, taxes, or import duties.
Instruction Manuals:
We strive to keep costs as low as possible. Manuals are expensive to produce and the weight usually increases shipping costs, therefore we provide downloadable assembly instructions in PDF format at time of payment.
A customer account is created upon checkout. This allows access to order status, history, and manuals. Credit card information is never available to Payette Valley Models.
Unlimited access to downloadable material is granted via “My Account” as long as the account remains active.
If a written manual is desired, please contact us and we will provide one for a materials fee and shipping costs (usually 1st-class mail).
Guarantee
Applies to domestic (US) orders only. If you have purchased one of our kits direct from this web site, we will replace any parts that might be missing or were damaged during shipment at no charge. There is no guarantee for kits purchased elsewhere as we have no control over such. We will request a photo of the damaged package.
This guarantee excludes parts not damaged during shipment or stripwood. We can usually replace these items – if available – for a material and shipping fee.
We will replace damaged parts on international orders at material and shipping cost.
Please contact us with any questions.
Flat rate shipping cost is provided are for US and Canada addresses only. That price represents the least expensive method – usually USPS Ground for US and UPS Ground for Canada. We have no objections to shipping to international addresses but contact us at info@payettevalleymodels.com to obtain pricing.
International customers are responsible for any local fees, taxes, or import duties.
These kits are built with small parts of wood, resin, and metal. They are not recommended for children under age 14.
When assembling these kits, exposure to dangerous materials is possible. Eye protection, gloves, respirator, and a well-ventilated workspace are recommended when sanding or drilling resin parts.
Always wash hands after handling glues, paints, resin, metal, or plastic parts.
Unfortunately, not all acrylic paints are the same. This is a significant issue when thinning them; the process is not as straightforward as some suggest.
One of the most commonly recommended thinners is distilled – not tap – water (tap water often has additives that interfere with the paint composition). However, the wood commonly used in HO scale models can expand and warp when water is applied – so many recommend the use of alcohol as a thinner.
The most common alcohol has a 70% alcohol concentration; the other 30% is water which is enough to defeat the purpose. Better is 90% isopropyl alcohol with only 10% water. Others may recommend “denatured” alcohol – ethanol (drinking alcohol – treated to be undrinkable). Perhaps “Everclear” would work but why pay the alcohol tax? 99.5% ethanol can be purchased for about $30/gallon.
However, alcohol isn’t compatible with many premium brands of water-based acrylic paints. For example, the Vallejo brand is a premium acrylic paint but the company specifically tells the user to not use alcohol as it will cause clumping. Us’ens here at Payette Valley Models can attest to that fact … and Vallejo is one of our primary brands in the shop.
Vallejo suggests either distilled water or Vallejo’s Airbrush Thinner. The airbrush thinner is our choice to avoid using water on wood. AK Interactive, another premium brand, makes the same suggestion: distilled water or their own brand of thinner. The Vallejo-brand thinner will also work on AK’s paints. Both brands specifically suggest avoiding the use of alcohol-based thinners. Tamiya is another premium brand; they recommend their own thinner or isopropyl alcohol. They do not recommend water.
Craft-style acrylic paints usually have less pigmentation than the premium brands. They are also less expensive. They are suitable – maybe even more desirable – for undercoats and washes.
Common brands include Apple Barrel, FolkArt, DecoArt, and Americana. Apple Barrel recommends a combination of Windex and distilled water or isopropyl alcohol. FolkArt and DecoArt both suggest distilled water or an acrylic thinning medium such as GAC200 with water. None of these recommend alcohol as a thinner.
Our recommendation is to use an airbrush thinner; we use Vallejo’s.
Our 3D printed parts are formed in semi-transparent resin. This resin is designed for precision and detail. The cured part is hard but mildly flexible. It may be drilled, tapped, and sanded. Small and highly detailed parts are fragile and may easily break.
The resin part has been cleaned before shipping but if additional cleaning is desired, a high concentration (90+%) ethanol (preferred), isopropyl, or methanol (less desirable) alcohols are recommended. Do not use acetone. Water will not harm the part but is not an effective cleaning agent. A soft toothbrush is suitable for cleaning the parts.
Alcohol is highly flammable. Use caution when cleaning.
Typical plastic glue does not work on this material. Superglues or 2-part epoxies work well but we prefer clear Gorilla Glue; it allows a little more “tweak-it” time and is not as messy or wasteful as epoxy can be … though epoxy is preferable where a strong bond is called for.
The resin parts usually require a thin primer coat of paint.
Some printed parts are packaged and shipped on their support structures. This helps prevent damage of fragile parts. Fine flush-cut nippers and small files are highly recommended to cut parts away from the supports.
We reserve the right to use alternate resins as we feel appropriate.
It is recommended that eye protection and gloves be used when sanding or drilling resin parts.
We do not manufacture nor supply roofing material in our kits. The modeller’s choice of roofing for a particular kit varies greatly and for us to provide a specific material would substantially increase the kit price.
Roofing materials for our kits are usually wooden shake shingles, tarpaper, corrugated tin, or asphalt shingles. The particular material used is often dependent on the building type, age, and era being modeled.
Tarpaper roofing can be made from 3ft wide (0.43 “real” inches) sections of white tissue paper. Apply using Aleens Tacky glue, let dry, and color with thin washes of a desired color – often black faded to a dark grey.
Ridge caps may be formed by folding a 1″ or 2″ wide sheet of thin paper, then trimming the width to a desired size – perhaps 6″ to a side (69 mils or about 1/16″ = 5.4″)
it was not uncommon for 20th century repairs to worn-out shake shingles to use corrugated tin panels directly over the old shake shingles.
Wild West Scale Model Builders, Builders-In-Scale, Northeastern Scale Lumber are among a variety of suppliers of roofing materials. Walthers is a source for the Campbell shingle rolls. Other suppliers are also available.
Some of our kits have etched lines at 6″ spacing to be used as guide for shingles.
We supply glazing material in the form of uncut 4mil acetate sheets. Glazing is often a matter of individual choice where materials such as microscope slide glass, clear glues, and other materials are used.
The clear glues (Zapf’s Canopy 560 for example) work OK for small pane, “old” type windows but not for larger windows. The process involves “pulling” the wet glue to fill the pane and let dry. This is best done on a material to which the glue doesn’t stick – wax paper being one example. The windows should remain flat while the glue dries.
The Canopy 560 glue is also preferred for fastening acetate to the window/door frames. Most glues will not adhere to acetate.
Lucite sheets are an option but most sheet thicknesses are too large (1/32″ or 31 mil is 2.7 scale inches thick). The 4 mil (1/250″) acetate we supply is ⅓” scale inches thick – closer to prototype. We do not fit the acetate to windows or doors.
In most cases, alternate glazing methods and material is left to the modeller.
Most of our kits are developed directly from measurements of the prototype. For cases where the prototype no longer exits, measurements are estimated from analysis of existing photos. And in some cases, the kit represents a composite of prototype structures.
We usually develop models from the late 1800s to early 1900s though exceptions may exist.
Kit parts are subject to minor changes.
Each kit is hand-packed to a checklist. Even so, occasional errors may occur. If a part is missing or damaged, contact us via email using “Parts” in the subject line and include you order information. A replacement will be sent right away.
A flat working surface at a comfortable height. Sitting or standing is personal choice. A 14” x 14” piece of plate glass with beveled edges is excellent for making sure of a flat surface.
Good lighting is also necessary. With LED lighting, color temperature is important. Without going into too many details, color is related to temperature as shown in this chart. (this is not temperature as in “how hot is it?”)
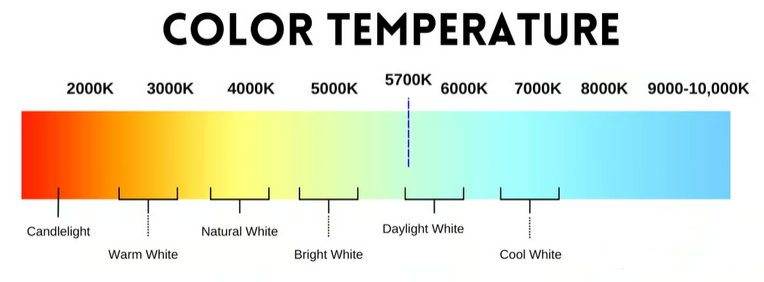
Typical incandescent bulbs are a warm white – around 3000K. A more neutral white is rated at around 4000K. Bright daylight is rated at around 5000K. A “cool” white may have a temperature rating of 7000K. The lower the temperature rating, the warmer the color.
The color of light can affect how the model looks: colors that look correct under fluorescent bulbs will look different under incandescent bulbs. Your eyes and brain may adjust but the difference is very noticeable with a camera.
LED lights can be bought in a variety of temperatures – different color lighting can set a mood on a layout; building a kit under a color of about 4000 offers a balance of color accuracy and brightness.
X-Acto knife – or similar. The workhorse of cutting tools, most commonly with a #11 blade. Save money by buying in lots of 100, they will be used.
A cutting pad will allow a knife blade to cut through a part without damaging the blade.
Rulers. A scale rule is marked in dimensions for the desired scale; a regular ruler marked in at least 32nds if not 64ths for HO. 12” long is handy; 6” (43ft in HO) also works.
Toothpicks: used for applying glue, tweaking parts in hard to reach places, bracing for walls … and posts and columns; many toothpicks are approximately 8-9” in diameter in HO scale.
Painting: we tend to stick to acrylics and oil-based stains (Minwax, etc). We keep a sheet of basswood (our primary wood) and put a dab of different stains as a reference. Stains will look different on different woods and the generic color guides can be misleading.
See the section on “Acrylic Paints” for comments on thinning.
Wooden western buildings of the late 1800s, especially in boom towns tended to be bare wood or painted white or red oxide as those were cheap paint pigments of the day. While most such buildings are pictured in our minds as weathered browns or gray, modelling that time period would have buildings of fresh bare wood, only lightly weathered. New wood is a much lighter, slightly yellow color than aged. Rather than leave kit wood unfinished, a lighter color oil stain or alcohol/chalk wash is recommended.
Speaking of chalks, Rembrandt chalks are suggested. Black, white, and medium gray are recommended as are a variety of raw and burnt umber and sienna. A medium gold ochre is also useful. Purchase of individual sticks is preferred over the purchase of sets.
A small amount of chalk scraped over the wood piece followed by a wash with alcohol can give excellent results. A small amount of chalk is all that’s needed; a uniform covering is often not desired.
An alcohol/ink mix is often suggested as a way to stain wood. 2 – 3 teaspoons ink (Higgins 46030 non-waterproof ink) to 1 pint of alcohol. 90% rubbing alcohol is preferred over the 70% version – the less water, the less warping. While black ink is assumed, other colors – primarily browns – may prove useful. An alcohol-based shoe leather dye is an alternative to ink. Fiebing’s is one among many brands.
Blackening agent: for coloring metal parts – white metal and brass. AK Interactive Meta Burnishing fluid is a good choice.
Bricks come in a variety of colors, depending on the clays used to make them. Most of us think of bricks as a brownish red … “brick color”. One method of coloring brick is to first paint the bricks Halloween orange. A sloppy coat is fine. Let that dry thoroughly, then apply washes of “brick color”: red oxide and other dark reds. A variety of similar colors is preferred. The washes do not need to be uniform but several washes are necessary. Let each dry before applying the next.
Mortar: With a wall section facing up and using a brush, apply a very thinned alcohol wash of white or near white over the entire brick section. Let partially dry, then gently blot the wall with a wet sponge. Repeat as necessary. Use black A&I to indicate drippings under windows and eaves as well as smoke coloring around chimneys.
Resin: the resin is not styrene, plastic cements won’t hold. Clear Gorilla Glue is our first choice but epoxy or “superglue” will work. Epoxy will form the strongest bond but can be wasteful and messy.
The resin usually requires a primer coat of paint.
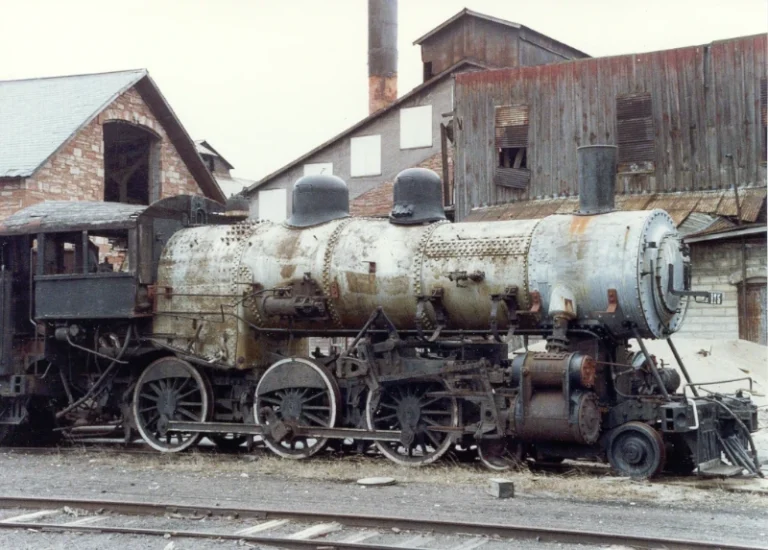
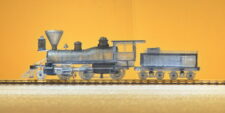
built 1908 by ALCO – photo circa 1991
more info